
Quick Overview
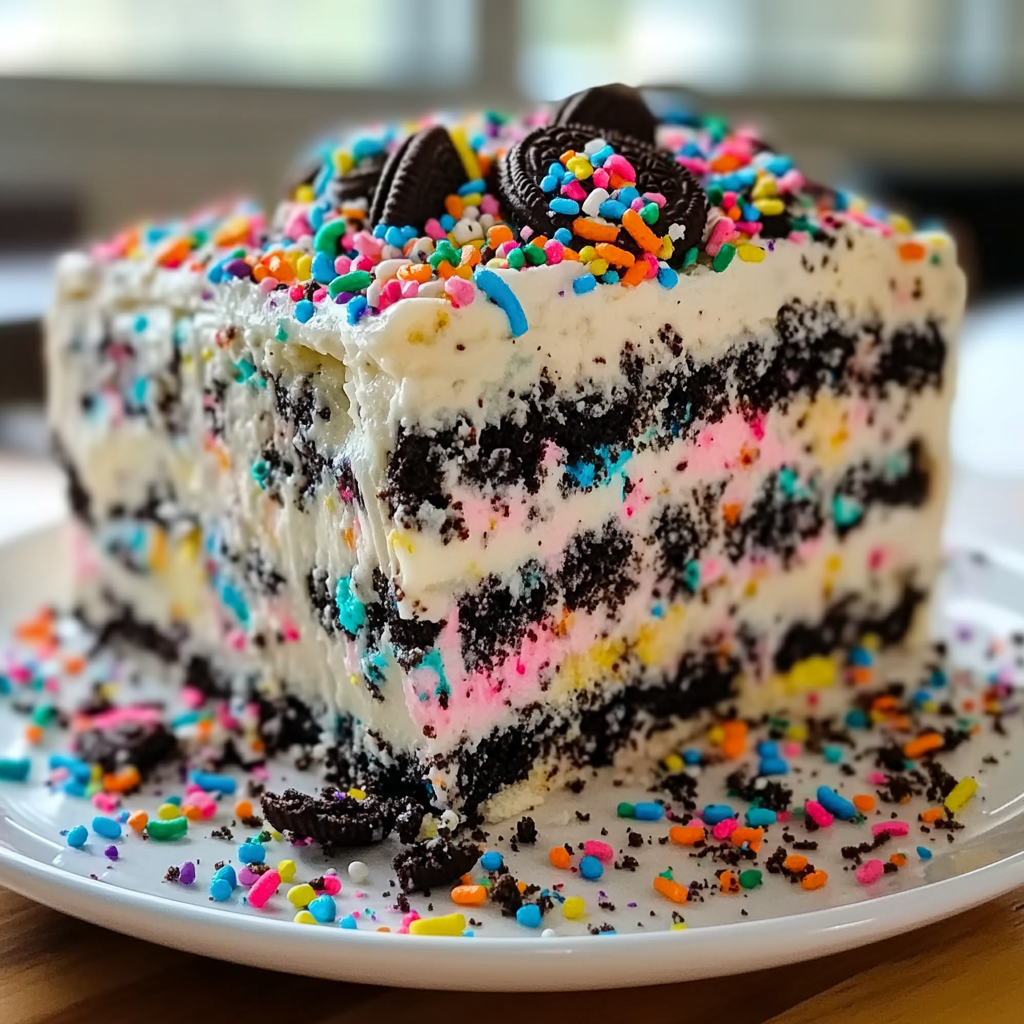
If you’re looking for a sweet treat that combines nostalgia with ease, the No-Bake Funfetti Oreo Icebox Cake is your answer. This delightful dessert requires no baking and comes together quickly, making it perfect for birthday parties or family gatherings. With layers of creamy filling and crunchy Oreos interspersed with colorful funfetti sprinkles, this cake not only looks fabulous but tastes incredible too. Get ready to impress your guests with this vibrant and delicious creation!
Ingredient Breakdown
Heavy Whipping Cream
You’ll need 2 cups of heavy whipping cream to create a rich and fluffy whipped topping. The cream should be chilled before whipping to help achieve the right consistency. This ingredient is essential for giving the icebox cake its light texture.
Cream Cheese
One package (8 oz) of cream cheese is required to add a creamy base flavor to your filling. Make sure it’s softened to room temperature for easy mixing. Cream cheese provides a tangy taste that balances the sweetness of the whipped cream.
Sugar
Add 1/2 cup of granulated sugar to sweeten the filling. Adjust according to your preference if you like it sweeter or less sweet. Sugar works with the cream cheese and whipped cream to create a deliciously smooth mixture.
Funfetti Sprinkles
You’ll need 1/2 cup of funfetti sprinkles to give your cake that colorful pop. These sprinkles add visual appeal and a bit of extra sweetness. They make the cake festive and are great for celebrations.
Oreo Cookies
For this recipe, you’ll require 24 Oreo cookies. These will serve as the layers in your icebox cake. Crush half of them into crumbs while leaving the others whole for layering. Oreos add chocolatey flavor and texture contrast.
Milk
You’ll need about 1 cup of milk for dipping the Oreo cookies before assembling the cake. Use any kind of milk you prefer—whole, skim, or plant-based works well. Milk helps soften the cookies without making them soggy.
Step By Step Recipe: No-Bake Funfetti Oreo Icebox Cake
Step 1: Prepare the Whipped Cream
Start by pouring 2 cups of heavy whipping cream into a large mixing bowl. Using an electric mixer on medium speed, whip until soft peaks form—this should take about 3-5 minutes. Gradually add in 1/2 cup sugar while continuing to whip until stiff peaks form. Set aside once done; this will be your fluffy topping.
Step 2: Mix Cream Cheese Mixture
In another bowl, combine one package (8 oz) of softened cream cheese with remaining whipped cream mixture gently folding until fully mixed together. Be careful not to deflate your whipped cream; a light hand is essential here! Add in 1/2 cup funfetti sprinkles at this stage for flavor and color.
Step 3: Dip Oreos in Milk
Take your 24 Oreo cookies and dip them quickly into about 1 cup of milk—just enough to soften them slightly without becoming mushy. Place dipped cookies on paper towels briefly to drain excess milk before assembling layers in your dish.
Step 4: Assemble the Layers
In a rectangular dish (9×13 inches works great), start layering by placing dipped Oreos at the bottom in a single layer. Spread half of your funfetti cream mixture over these cookies evenly using a spatula. Repeat this process by adding another layer of dipped Oreos followed by another layer of filling until you finish with filling on top.
Step 5: Chill in Refrigerator
Cover your assembled icebox cake tightly with plastic wrap or foil and place it in the refrigerator to chill for at least four hours or overnight if possible—this allows all flavors to meld beautifully together while achieving optimal firmness.
Step 6: Serve Up Your Creation
After chilling time is complete, remove from refrigerator and slice into squares using a sharp knife—it’s best if warmed slightly under hot water before cutting through crispy cookie layers! Each bite should reveal delightful layers filled with sweetness.
Serving and Storing Tips
Tip 1: Serve Chilled
This No-Bake Funfetti Oreo Icebox Cake is best served cold right from the refrigerator after chilling completely—that keeps it firm yet creamy! Consider garnishing each piece with extra funfetti sprinkles for added flair when serving guests at parties or gatherings!
Tip 2: Store Properly
To store leftovers effectively, cover them tightly with plastic wrap or transfer individual slices into airtight containers before refrigerating again—this way they stay fresh up-to three days! Avoid freezing as that may alter texture significantly due to moisture content in ingredients used here.
By following these steps closely along with recommended tips above ensures you enjoy every delightful bite from this no-bake wonder while impressing everyone around!
Mistakes to avoid
One common mistake when making a No-Bake Funfetti Oreo Icebox Cake is not letting the cake set long enough. If you cut into it too soon, the layers may not hold together, leading to a messy presentation. Always allow ample time for chilling in the refrigerator before serving.
Another mistake is overlooking ingredient temperatures. Using room-temperature cream cheese and whipped topping helps create a smooth filling. Cold ingredients can result in lumps, affecting both texture and taste.
Additionally, don’t skip the soaking step for the Oreos. Quickly dipping them in milk is crucial for achieving that soft cake texture. If you leave them dry, they will remain hard and chewy instead of blending beautifully with the filling.
Lastly, be cautious with portion sizes. It’s easy to make this dessert too sweet if you overload on sprinkles or toppings. Stick to a balanced amount to maintain flavor harmony throughout each slice of your icebox cake.
Tips and tricks
To create a perfect No-Bake Funfetti Oreo Icebox Cake, consider using high-quality chocolate sandwich cookies for a richer flavor. The choice of Oreos significantly impacts the overall taste of your dessert. Opt for classic Oreos or even flavored varieties to match your preference while ensuring a delightful crunch in every bite.
When preparing the filling, whip the cream cheese until it’s fluffy before adding other ingredients. This method ensures a light and airy texture that complements the dense layers of cookies perfectly. Be patient and whisk until you achieve that ideal consistency.
Chilling is essential for this recipe; aim for at least four hours or overnight if possible. A longer chilling period allows flavors to meld beautifully and ensures that each slice holds its shape well when served. Patience pays off with this icebox cake!
Lastly, experiment with different toppings like whipped cream or chocolate drizzle before serving. These additions not only enhance visual appeal but also add extra flavor dimensions to your No-Bake Funfetti Oreo Icebox Cake.
Suggestions for No-Bake Funfetti Oreo Icebox Cake
If you’re looking to customize your No-Bake Funfetti Oreo Icebox Cake further, consider incorporating various flavors into the filling. For example, adding vanilla extract can elevate the overall taste profile without overpowering other ingredients. You could also mix in some mini chocolate chips for an extra texture surprise.
For those who enjoy a fruity twist, try folding in crushed strawberries or raspberries into the filling mixture. This addition adds freshness and balances sweetness while creating a vibrant color contrast within your cake layers.
For a unique spin on presentation, you can crush some additional Oreos as a topping before serving. This not only adds crunch but also garnishes your cake beautifully, making it perfect for parties or gatherings where visual appeal matters.
Lastly, think about using gluten-free Oreos if you’re catering to guests with dietary restrictions. This small change allows everyone to enjoy this delicious dessert without worries about gluten sensitivities.
FAQs
What makes No-Bake Funfetti Oreo Icebox Cake so popular?
No-Bake Funfetti Oreo Icebox Cake is popular due to its easy preparation and delightful flavor combination. It requires no baking, which appeals to those who may not have extensive baking skills or equipment at home. Additionally, its fun colorful sprinkles attract children and adults alike, making it a go-to dessert for celebrations or casual get-togethers.
How long should I refrigerate my No-Bake Funfetti Oreo Icebox Cake?
Refrigerating your No-Bake Funfetti Oreo Icebox Cake for at least four hours is crucial for ensuring it sets properly. However, overnight refrigeration is even better as it allows all flavors to meld together beautifully while creating that perfect creamy texture throughout each layer when served.
Can I use different types of cookies in this recipe?
Yes! While traditional Oreos work wonderfully in this recipe, feel free to experiment with other types of cookies as well. Chocolate chip cookies or even graham crackers can offer unique flavors and textures that complement the filling nicely while still maintaining that no-bake convenience factor.
Is there a way to make this recipe dairy-free?
Absolutely! To make a dairy-free version of No-Bake Funfetti Oreo Icebox Cake, choose dairy-free cream cheese alternatives available on the market today along with non-dairy whipped toppings made from coconut or almond milk bases instead of traditional dairy products without sacrificing flavor.
How do I store leftovers after making this cake?
Store any leftover slices of your No-Bake Funfetti Oreo Icebox Cake in an airtight container in the refrigerator for up to three days maximum while still maintaining freshness without compromising quality over time so you can enjoy them later!
Can I freeze this icebox cake?
Yes! You can freeze your No-Bake Funfetti Oreo Icebox Cake if you want to prepare it ahead of time or save leftovers beyond three days after making it fresh! Just wrap individual slices tightly in plastic wrap followed by foil before placing them into freezer-safe containers so they stay fresh during freezing periods!
Summary
In summary, creating an impressive No-Bake Funfetti Oreo Icebox Cake involves careful attention to detail regarding chilling times and ingredient quality. Avoid common mistakes such as cutting too early or neglecting ingredient temperatures for optimal results. With helpful tips like using high-quality Oreos and experimenting with fillings and toppings, you’ll delight everyone at your next gathering while ensuring this dessert remains both delicious and visually appealing!
Easy No-Bake Funfetti Oreo Icebox Cake Recipe
Description
If you’re looking for a sweet treat that combines nostalgia with ease, the No-Bake Funfetti Oreo Icebox Cake is your answer. This delightful dessert requires no baking and comes together quickly, making it perfect for birthday parties or family gatherings. With layers of creamy filling and crunchy Oreos interspersed with colorful funfetti sprinkles, this cake not only looks fabulous but tastes incredible too. Get ready to impress your guests with this vibrant and delicious creation!
Ingredients
Heavy Whipping Cream
You’ll need 2 cups of heavy whipping cream to create a rich and fluffy whipped topping. The cream should be chilled before whipping to help achieve the right consistency. This ingredient is essential for giving the icebox cake its light texture.
Cream Cheese
One package (8 oz) of cream cheese is required to add a creamy base flavor to your filling. Make sure it’s softened to room temperature for easy mixing. Cream cheese provides a tangy taste that balances the sweetness of the whipped cream.
Sugar
Add 1/2 cup of granulated sugar to sweeten the filling. Adjust according to your preference if you like it sweeter or less sweet. Sugar works with the cream cheese and whipped cream to create a deliciously smooth mixture.
Funfetti Sprinkles
You’ll need 1/2 cup of funfetti sprinkles to give your cake that colorful pop. These sprinkles add visual appeal and a bit of extra sweetness. They make the cake festive and are great for celebrations.
Oreo Cookies
For this recipe, you’ll require 24 Oreo cookies. These will serve as the layers in your icebox cake. Crush half of them into crumbs while leaving the others whole for layering. Oreos add chocolatey flavor and texture contrast.
Milk
You’ll need about 1 cup of milk for dipping the Oreo cookies before assembling the cake. Use any kind of milk you prefer—whole, skim, or plant-based works well. Milk helps soften the cookies without making them soggy.