
 Pin
Pin
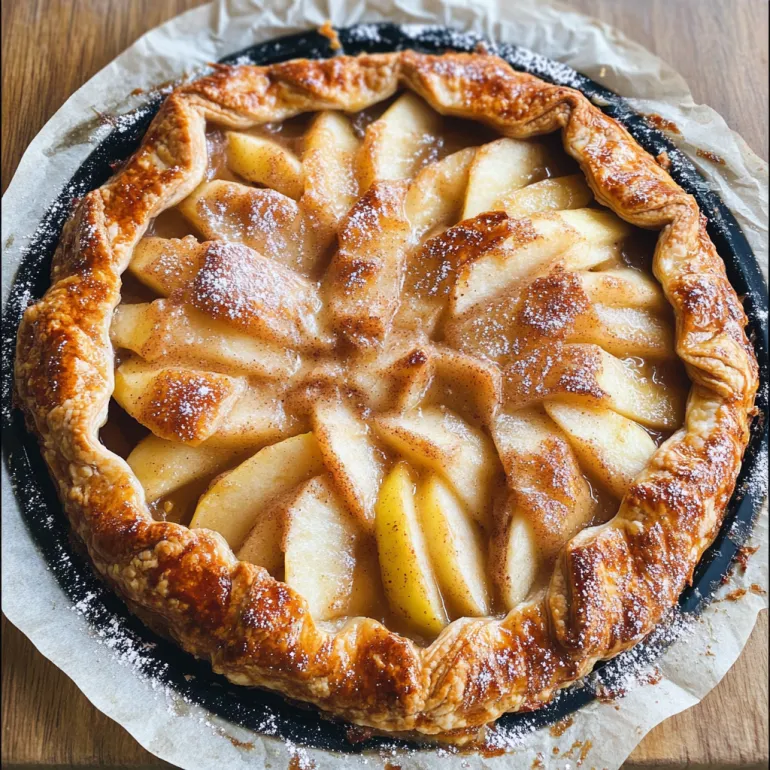
This rustic cinnamon apple galette delivers all the cozy flavors of a traditional apple pie but with half the effort. The buttery, flaky crust cradles tender spiced apples for a dessert that looks impressive despite being wonderfully straightforward to prepare.
I first made this galette for a last-minute dinner party when I realized I had forgotten to prepare dessert. The rustic, free-form nature meant I could throw it together quickly, and it has since become my go-to impressive-but-easy sweet treat for both casual family nights and special occasions.
Ingredients
- All-purpose flour: Forms the foundation of our buttery crust
- Cold unsalted butter: Creates those essential flaky layers in the pastry
- Ice water: Helps keep the butter cold while bringing the dough together
- Medium apples: Work perfectly here, I prefer a mix of sweet and tart varieties
- Cinnamon: Adds that classic warming spice that pairs perfectly with apples
- Sugar: Balances the tartness of the apples and helps create a light caramelization
- Egg wash: Gives the crust that beautiful golden color and slight shine
Step-by-Step Instructions
- Make the dough:
- Process flour, sugar, and salt in your food processor until combined. Add the cold butter cubes and pulse until the mixture resembles wet sand with some pea-sized chunks remaining. This creates pockets of butter that will make your crust flaky. Gradually add ice water while pulsing until the dough comes together along the side of the bowl. The dough should hold together when pressed but not feel sticky.
- Chill the dough:
- Form the dough into a ball and wrap tightly with plastic wrap. Refrigerate for at least 30 minutes but ideally an hour. This rest time allows the gluten to relax and the butter to firm up again, which is crucial for a flaky texture. You can prepare this up to 2 days ahead if needed.
- Prepare for baking:
- Preheat your oven to 375°F and line a baking sheet with parchment paper. The parchment prevents sticking and makes cleanup easier. Take your chilled dough from the refrigerator and let it sit for about 5 minutes to slightly soften for easier rolling.
- Roll the dough:
- On a lightly floured surface, roll the dough into a 12-inch circle about 1/8-inch thick. Transfer to your prepared baking sheet. Use a 9-inch cake pan to make a slight indentation in the center, creating a guide for where to place your apple slices.
- Prepare and arrange apples:
- Peel, core, and slice your apples as thinly as possible, about 1/8-inch thick. Thin slices ensure they cook through and become tender. Fan out each half by gently pressing them with your fingers, then carefully lift each fanned section using a knife underneath. Arrange decoratively starting from the outside of your marked circle, overlapping slightly as needed.
- Add flavor enhancers:
- Mix cinnamon and sugar in a small bowl until well combined, then sprinkle evenly over the arranged apples. Dot with small cubes of cold butter, which will melt into the apples as they bake, creating a rich, buttery sauce.
- Fold the crust:
- Gently fold the outer edges of the dough over the apples, pleating every few inches to create that rustic galette look. The center remains open, showcasing your beautiful apple arrangement. Brush the exposed dough with egg wash for a golden finish.
- Bake to perfection:
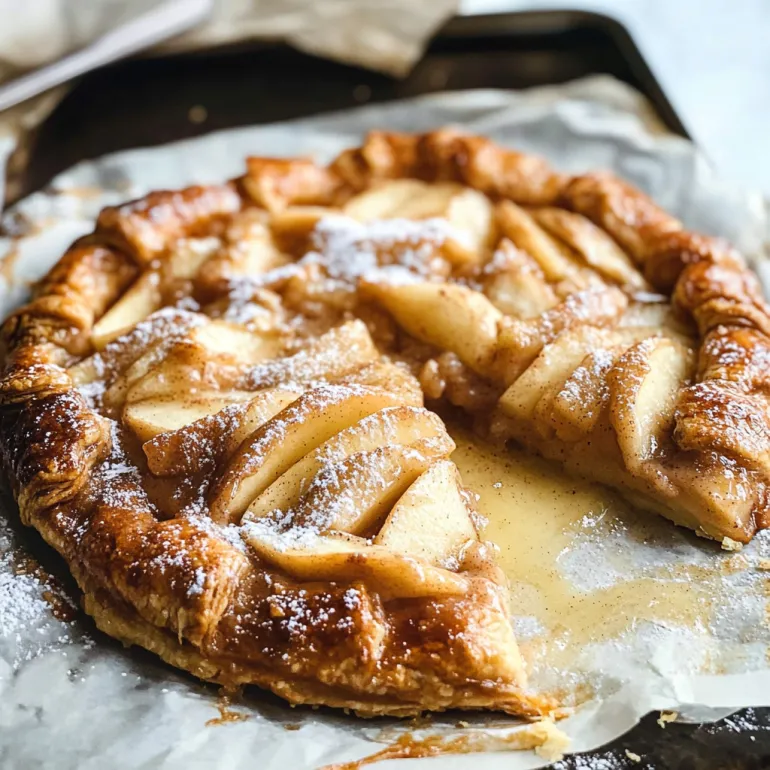
- Bake for 30-40 minutes until the crust is deeply golden and the apples are tender when pierced with a knife. Let cool for 10-15 minutes before serving to allow the filling to set slightly. Serve warm with a scoop of vanilla ice cream for the perfect contrast of warm galette and cold, creamy ice cream.
 Pin
Pin
I learned to make galettes from my grandmother, who always insisted that imperfection was part of their charm. She taught me that the butter must be very cold and to handle the dough as little as possible. Her secret was adding a tiny pinch of cardamom to the cinnamon-sugar mixture, which I sometimes include when I want to elevate the flavor profile even further.
Make-Ahead Options
This galette can be fully assembled and refrigerated unbaked for up to 24 hours before baking. Simply add about 5 extra minutes to the baking time if cooking from cold. You can also freeze the unbaked galette for up to a month. Thaw in the refrigerator overnight before baking. The baked galette keeps well at room temperature for 2 days, loosely covered with foil, though the crust will soften slightly over time.
 Pin
Pin
Perfect Pairing Suggestions
While vanilla ice cream is the classic companion, this galette also pairs beautifully with caramel sauce, dulce de leche, or a dollop of crème fraîche. For a special touch, try serving it with a glass of spiced apple cider in fall or a late harvest dessert wine year-round. The slight tartness of the apples complements these sweet accompaniments perfectly.
Troubleshooting Tips
If your dough feels too sticky, add a bit more flour, a tablespoon at a time. If it seems too dry and crumbly, add more ice water, a teaspoon at a time. Should your galette leak juices during baking, simply spoon them back over the apples when you remove it from the oven. If the crust is browning too quickly during baking, loosely cover the edges with foil strips.
Frequently Asked Questions About the Recipe
- → Can I make the dough ahead of time?
Yes! The dough can be prepared up to 2 days in advance and stored tightly wrapped in plastic in the refrigerator. This actually improves the texture as it allows the gluten to relax and the butter to thoroughly chill.
- → What apple varieties work best for this galette?
Firm, tart-sweet apples like Honeycrisp, Granny Smith, Braeburn, or Pink Lady work wonderfully. They hold their shape during baking while developing tender texture and balanced flavor. Feel free to use a mix of varieties for complex flavor.
- → Can I add other spices or flavors?
Absolutely! While cinnamon is classic, you can enhance the filling with nutmeg, cardamom, ginger, or allspice. A splash of bourbon or vanilla extract adds depth, and lemon zest brightens the apple flavor. Chopped nuts or dried fruit make excellent additions too.
- → How do I prevent a soggy bottom crust?
For the crispest bottom crust, make sure your oven is fully preheated, use a baking sheet with good heat conduction, and consider sprinkling a thin layer of flour, ground nuts, or even cookie crumbs under the apples to absorb excess moisture.
- → Can I freeze this galette?
You can freeze the galette either before or after baking. To freeze unbaked, assemble completely, then freeze solid on the baking sheet before wrapping well. Bake from frozen, adding 10-15 minutes to the baking time. Baked galettes can be frozen, tightly wrapped, for up to 3 months. Reheat in a 350°F oven until warmed through.
- → What can I serve instead of vanilla ice cream?
While vanilla ice cream is classic, this galette pairs beautifully with caramel ice cream, cinnamon gelato, whipped cream, crème fraîche, or a drizzle of caramel sauce. For special occasions, try serving with a slice of sharp cheddar cheese or a splash of bourbon cream.