
 Pin
Pin
This homemade cronut recipe brings the magic of a bakery-quality treat right to your kitchen. The delicate layers of buttery pastry combined with sweet cream filling create an irresistible dessert that's worth every minute of preparation. After years of testing different methods, I've perfected this technique for achieving those signature flaky layers while maintaining a light, airy texture.
I first attempted cronuts after visiting a famous New York bakery and being shocked at the line stretching around the block. My family now requests these for every special occasion, and the joy on their faces when they take that first bite makes the effort completely worthwhile.
Ingredients
- All-purpose flour: forms the foundation of your cronut dough ensuring proper structure
- Sugar: adds just the right sweetness to complement the filling
- Salt: enhances all flavors and balances the sweetness
- Unsalted butter: must be cold for creating those perfect flaky layers
- Warm milk: activates the yeast and contributes richness
- Active dry yeast: provides the lift and slight fermentation for authentic flavor
- Egg: binds the dough together while adding richness
- Vanilla extract: enhances the overall flavor profile
- Vegetable oil: with a high smoke point is essential for proper frying
- Sugar for coating: gives that classic sweet exterior
- Pastry cream or whipped cream: fills each cronut with luxurious sweetness
- Additional vanilla extract: deepens the cream filling flavor
Step-by-Step Instructions
- Activate the Yeast:
- Pour warm milk into a small bowl and sprinkle yeast over the surface. Allow it to sit undisturbed for 5 minutes until foamy and fragrant. The milk should be warm not hot about 110°F or it will kill the yeast.
- Create the Dry Base:
- In a large mixing bowl whisk together flour sugar and salt until well combined. This ensures even distribution of sweetness and seasoning throughout your dough.
- Incorporate the Butter:
- Add the cold cubed butter to the flour mixture and use a pastry cutter or your fingertips to work it in until the mixture resembles coarse crumbs with pea-sized butter pieces remaining. These butter pieces will create the signature flaky layers as the dough bakes.
- Form the Dough:
- Pour in the yeast mixture egg and vanilla extract. Stir with a wooden spoon until a shaggy dough forms. The dough will appear somewhat lumpy which is exactly what you want for maximum flakiness.
- Develop Structure:
- Turn the dough onto a lightly floured surface and knead for 5 to 7 minutes. The dough should become smooth but will still have visible butter pieces. Avoid overworking which can melt the butter and diminish layering.
- First Rest Period:
- Wrap the dough tightly in plastic wrap and refrigerate for at least 1 hour. This chilling time relaxes the gluten and firms up the butter for successful lamination.
- Laminate the Dough:
- On a well floured surface roll the chilled dough into a large rectangle approximately 12x18 inches. Fold the dough like a business letter bringing the bottom third up and the top third down. Rotate 90 degrees and repeat this rolling and folding process two more times. Return to refrigerator for 15 minutes if butter begins softening.
- Shape and Rise:
- Roll the laminated dough to 1/2 inch thickness and cut into rounds using a 3inch cutter. Use a smaller cutter to create the center holes. Place shaped dough on a parchment lined baking sheet and allow to rise in a warm spot for 30 minutes until slightly puffy.
- Fry to Perfection:
- Heat oil in a heavy bottomed pot to exactly 350°F monitoring with a thermometer. Carefully lower cronuts into hot oil 2 at a time and fry for 2 to 3 minutes per side until deeply golden brown. Adjust heat as needed to maintain temperature.
- Finish and Fill:
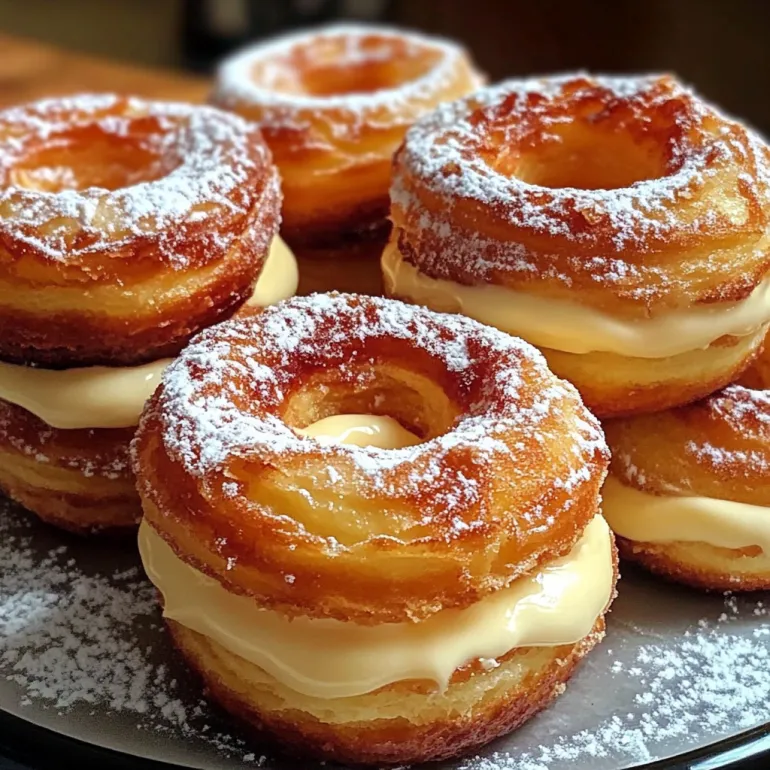
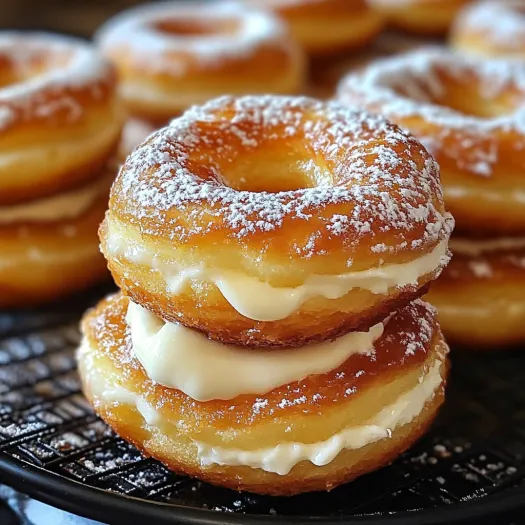
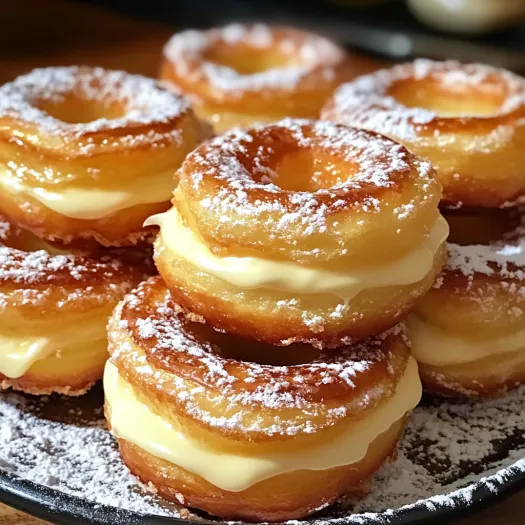
- Roll warm cronuts in sugar to coat completely. Once cooled use a small knife to create a pocket in the side of each cronut. Fill a piping bag with cream filling and pipe generously into each pastry until slightly heavy.
 Pin
Pin
The cold butter lamination is absolutely my favorite part of this recipe. After years of making these treats I still feel a sense of accomplishment when I cut into a finished cronut and see those perfect layers. My daughter now stands on a stool beside me during the folding process asking to help with what she calls the "magic butter trick."
Mastering the Oil Temperature
Maintaining precisely 350°F oil temperature is crucial for perfect cronuts. Too hot and they'll brown before cooking through too cool and they'll absorb excess oil becoming greasy. I recommend using a candy thermometer clipped to the side of your pot and adjusting the heat constantly throughout frying. Allow the oil to recover between batches before adding new cronuts. After numerous attempts I found that starting with slightly higher heat then reducing once the cronuts are added helps maintain the perfect temperature.
 Pin
Pin
Making Ahead Options
The beauty of this recipe lies in its flexibility for preparation. The dough can be made up to 24 hours in advance and kept refrigerated which actually improves flavor development. You can also freeze cut unfried cronuts for up to one month. Simply thaw in the refrigerator overnight then allow to rise at room temperature for 1 hour before frying. The cream filling can be prepared 2 days ahead and stored in an airtight container in the refrigerator. However for the best eating experience fill cronuts no more than 2 hours before serving to maintain the perfect contrast between crisp exterior and creamy center.
Flavor Variations
While vanilla cream filling is traditional these cronuts welcome creative adaptations. Try chocolate ganache filling by heating 1 cup heavy cream and pouring over 8 ounces chopped chocolate. A seasonal approach works beautifully with pastry cream infused with citrus zest in winter or fresh berry compote folded into whipped cream during summer months. For special occasions consider adding 2 tablespoons of your favorite liqueur to the pastry cream. My family particularly loves when I add maple extract to both the dough and filling during fall gatherings creating an unforgettable maple bar effect with the cronut texture.
Serving Suggestions
Cronuts shine when served as the centerpiece of a special breakfast or brunch. Pair with fresh berries and a dollop of extra whipped cream for an indulgent presentation. For afternoon tea create a stunning display by arranging cronuts on a tiered stand alongside fresh fruit and small glasses of dessert wine. When serving for dessert try plating with a scoop of vanilla bean ice cream and a drizzle of warm chocolate sauce. These treats demand to be enjoyed immediately after filling when the contrast between warm crisp exterior and cool creamy filling creates the ultimate sensory experience.
Frequently Asked Questions About the Recipe
- → Can I make the dough ahead of time?
Yes, you can prepare the dough up to 24 hours in advance and keep it refrigerated. The cold fermentation actually improves flavor development. Complete the folding process before storing, then bring to room temperature for 30 minutes before cutting and frying.
- → Why is it important to keep the dough cold?
Cold dough maintains separation between the butter layers and the dough, which is essential for creating the signature flaky texture. If the butter melts into the dough during folding, you'll lose the distinct layers that make cronuts special.
- → Can I bake instead of fry these cronuts?
While traditional cronuts are fried, you can bake them at 375°F for about 15-18 minutes until golden brown. The texture will be slightly different—more like a croissant—but still delicious. Brush with melted butter before baking for a golden finish.
- → What other fillings work well besides vanilla cream?
Chocolate ganache, lemon curd, raspberry jam, dulce de leche, and coffee pastry cream are excellent alternatives. You can also infuse the vanilla cream with flavors like orange zest, cinnamon, or almond extract for subtle variations.
- → How can I store leftover cronuts?
Cronuts are best enjoyed fresh on the day they're made. If necessary, store unfilled cronuts in an airtight container at room temperature for 1-2 days. Fill just before serving. For longer storage, freeze unfilled cronuts and thaw at room temperature before warming in a 300°F oven for 5 minutes.
- → Why did my cronuts collapse after frying?
Collapsed cronuts typically result from underproofing (not rising enough before frying) or inconsistent oil temperature. Ensure they rise until puffy before frying and maintain a steady 350°F oil temperature throughout the cooking process.