
 Pin
Pin
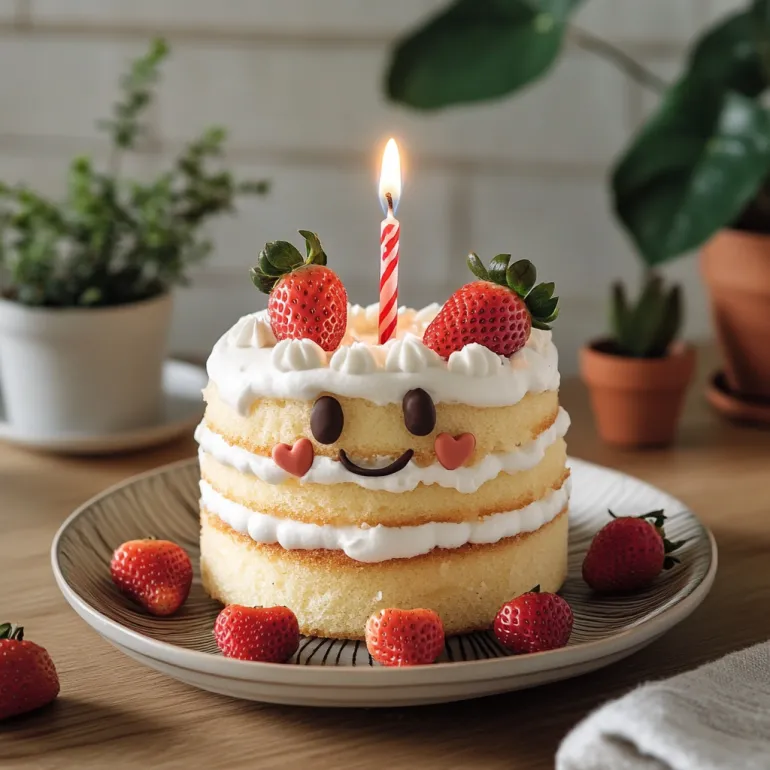
Ever since my niece fell in love with her Jellycat Birthday Cake plushie this cake has been the star of every family birthday. With soft vanilla layers, fresh strawberry jam, billows of fluffy cream, and a playful face piped in chocolate it brings a smile to everyone around the table.
I first made this for a child’s birthday to mimic a favorite plush toy and now the adults fight for a slice just as eagerly as the kids.
Ingredients
- All-purpose flour: Makes the cake delicate and soft Always choose fresh flour without an off smell
- Baking powder: Gives rise and lightness Opt for aluminum-free for best flavor
- Salt: Balances sweetness and sharpens flavors Fine sea salt works best
- Large eggs: Provides structure and richness Use at room temperature for smooth blending
- Granulated sugar: Adds sweetness and helps aerate the cake Look for fine, pure white sugar
- Unsalted butter: Delivers buttery flavor Use good quality European style for extra depth
- Milk: Adds moisture and tenderness Any fresh dairy or unsweetened non-dairy milk works
- Neutral oil: Keeps the cake extra soft Choose something light like canola or sunflower
- Vanilla extract: Brings classic aroma and warmth Pure vanilla makes a difference here
- Whipping cream or heavy cream: Whips up rich and pillowy Be sure it is cold for best volume
- Powdered sugar: Gently sweetens the cream Sift it if lumpy
- Cocoa powder: For coloring and flavor Choose Dutch-processed for a deep brown color if you have it
- Strawberry jam: Brightens every bite with fruitiness Homemade or a high fruit content store jam is best
- Fresh strawberries: Add juicy bursts of flavor Pick berries that are deeply red and fragrant
- Dark chocolate: Used to create the face A high quality chocolate will pipe more smoothly
- Birthday candle: For the finishing touch A striped one adds extra cheer
Step-by-Step Instructions
- Prep the Pans:
- Preheat your oven to three hundred fifty degrees Fahrenheit and line two six inch round cake pans with parchment on the bottom This prevents sticking and gives a clean release
- Mix Dry Ingredients:
- In a small bowl blend flour baking powder and salt with a spoon Make sure there are no clumps so everything gets evenly distributed later
- Heat the Milk Mixture:
- In a small pot or microwave safe bowl combine butter milk oil and vanilla Heat just until the butter melts then cover to keep warm It should not boil Keeping it warm ensures it blends smoothly into the batter
- Beat Eggs and Sugar:
- In a large mixing bowl beat eggs and sugar on medium speed for a full six minutes till light almost white and tripled in volume This step gives the cake its fluffy lift
- Combine Wet and Dry Mixes:
- Add half the flour mixture and mix on low until just combined Add the rest of the flour and mix gently some dry patches are fine now to avoid over mixing
- Add Hot Milk Mixture:
- With mixer on low slowly pour in the warm milk mixture Beat until smooth and fluid with no lumps
- Fill the Pans:
- Divide batter between the prepared pans Each pan should be halfway full for even layers
- Bake and Cool:
- Bake in the center of the oven for thirty five to forty minutes A toothpick should come out with just a few crumbs Cool cakes in the pans for fifteen minutes then run a spatula around the edges and turn out onto a rack to cool completely
- Whip the Cream:
- In a cold bowl whip together the cream powdered sugar and vanilla Beat to soft peaks Take out a scoop to tint with cocoa powder for the cake’s legs then continue beating the rest to firm peaks Transfer both creams to separate piping bags with tips cut off
- Assemble and Fill:
- Place one cake layer on your plate Pipe rings of whipped cream along the edge and a thin layer towards the center Use a spatula to smooth inward filling the center with strawberry jam
- Top and Decorate:
- Place the second cake on top Pipe more cream on the surface and decorate with halved strawberries Pop a birthday candle right in the center
- Pipe the Legs:
- With the cocoa tinted whipped cream pipe two short legs at the cake base facing outward for the signature Jellycat look
- Draw the Face:
- Gently melt chopped dark chocolate Microwaving in short bursts works well Transfer to a small piping bag Pipe curved eyes and a smiling mouth between the legs right onto the cake layer
Pin
My favorite part is melting the chocolate and drawing a big smile for the face The first time I made it my nephew insisted on piping the legs himself and his lopsided version was even cuter
Storage Tips
Refrigerate the cake in an airtight container after slicing The whipped cream will stay fluffy for up to two days but berries can release juices Once sliced press a piece of wax paper against the cut edge to keep the cake moist
Ingredient Substitutions
Any jam can replace strawberry for a new twist Try raspberry or apricot if you prefer Non dairy milk and coconut or plant cream work fine for a dairy free cake Do not skip the cocoa powder for the legs or the face as it is the cute Jellycat signature
Serving Suggestions
Serve this chilled and slice with a sharp knife dipped in hot water for clean slices Add extra berries around the plate for a festive summer look For birthdays let the candles burn down until the cream just begins to melt for dramatic wishes
Cultural and Historical Context
Whipped cream filled Japanese style cakes inspired this soft fluffy texture The Jellycat design is a little nod to the playful way food and plush toys delight children in both British and Asian cultures Making a cake look like a beloved plush is my favorite way of bringing a story to the table
Frequently Asked Questions About the Recipe
- → What size pans are best for this cake?
Two 6-inch round cake pans work perfectly to create tall, fluffy layers for stacking and decorating.
- → Can I use non-dairy milk in the batter?
Yes, both dairy and non-dairy milk yield a tender, soft cake with excellent flavor and moisture.
- → How do I get ultra-light cake layers?
Thoroughly beat eggs and sugar until very pale and voluminous—this step ensures a soft, airy texture.
- → What’s the best way to assemble the filling?
Pipe whipped cream along the cake’s edge, spread jam in the center, and layer carefully for clean, distinct layers.
- → How do I create the Jellycat face and legs?
Melt dark chocolate for piping eyes and a smile, and use chocolate-tinted whipped cream to shape cute legs on the cake plate.
- → How long does the cake stay fresh?
For best taste and texture, enjoy within two days; store covered in the refrigerator to keep the cream and cake moist.