
 Pin
Pin
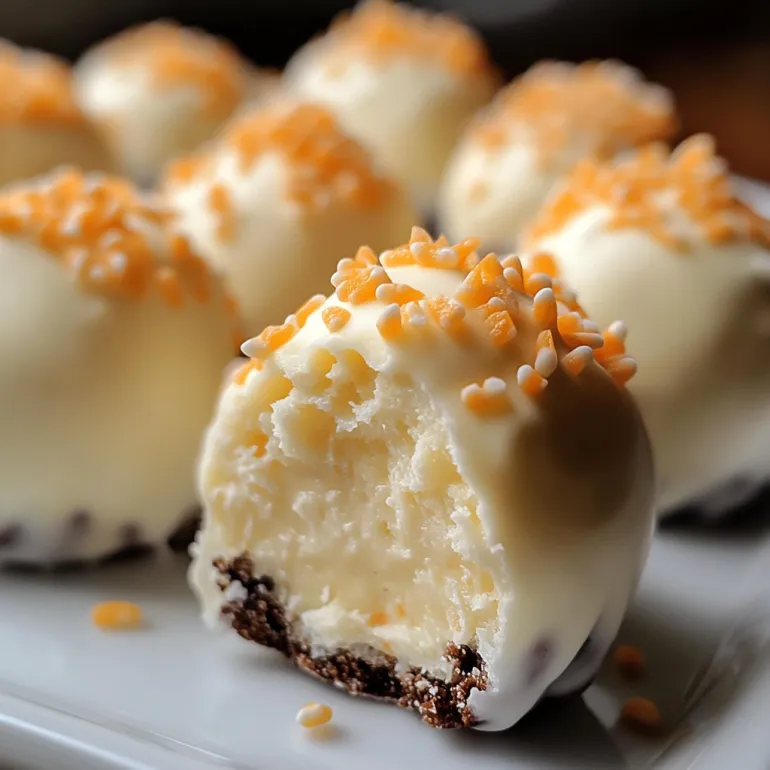
This bite-sized homemade Orange Creamsicle Truffles recipe captures that nostalgic orange and vanilla ice cream bar flavor in a no-bake truffle form. I created these for a summer gathering last year, and they disappeared faster than anything else on the dessert table.
These truffles have become my signature dessert contribution to potlucks. My nieces now request I bring a double batch to every family gathering because they claim they never get enough.
Ingredients
- Powdered sugar: Creates the sweet base and helps achieve that smooth creamy texture
- Unsalted butter: Adds richness and helps the truffles hold their shape
- Vanilla wafers: Provide structure and that classic vanilla flavor component
- Orange juice concentrate: Delivers intense orange flavor without adding too much liquid
- Orange zest: Amplifies the fresh citrus notes use organic oranges if possible
- Vanilla extract: Balances the citrus with warm vanilla undertones
- White chocolate coating: Creates that perfect outer shell and completes the creamsicle effect
Step-by-Step Instructions
- Prepare the Truffle Mixture:
- Beat the softened butter and powdered sugar until you achieve a light fluffy consistency about 2 minutes with an electric mixer. Make sure your butter is truly at room temperature not melted for best results. The mixture should look almost like frosting before moving to the next step.
- Mix in the Flavor Elements:
- Add the orange juice concentrate zest and vanilla extract stirring until fully incorporated. The mixture will become slightly looser but still thick. The orange juice concentrate provides concentrated flavor without making the mixture too wet which is crucial for proper truffle texture.
- Incorporate the Wafer Crumbs:
- Fold in the crushed vanilla wafers until a cohesive dough forms. The mixture should be firm enough to roll but still slightly sticky. If too wet add a few more crushed wafers if too dry add a tiny bit more orange juice concentrate until you reach the perfect consistency.
- Shape the Truffles:
- Scoop tablespoon sized portions and roll between your palms to create smooth balls. Slightly damp hands prevent sticking. Place each formed truffle on a parchment lined baking sheet spacing them about an inch apart to prevent sticking together.
- Chill Before Dipping:
- Refrigerate the formed truffles for a full 30 minutes. This step is absolutely essential do not skip it. Cold firm truffles are much easier to dip and will maintain their shape when they hit the warm chocolate.
- Melt and Dip Technique:
- Melt the white chocolate using short microwave intervals stirring thoroughly between each. When dipping use a fork to lower each truffle into the chocolate allowing excess to drip through the tines before transferring back to the parchment paper.
 Pin
Pin
These truffles remind me of summers at my grandmother's house where she always kept orange creamsicles in her freezer. The first time I made these for her, she claimed they tasted even better than the original popsicles she'd loved for decades.
Make Ahead and Storage
These truffles actually improve with a day of resting in the refrigerator as the flavors meld together. Store them in an airtight container with parchment paper between layers to prevent sticking. They'll maintain perfect quality for up to 7 days refrigerated or 3 months in the freezer. If freezing, thaw in the refrigerator overnight before serving.
Creative Variations
The basic truffle base lends itself to endless flavor possibilities. Try lemon concentrate and lemon zest for a tangy lemon drop version, or substitute lime for a key lime pie inspired treat. You can even add 1/4 cup of coconut to the base for a tropical twist. During holiday season, I often tint the white chocolate coating with orange food coloring and add festive sprinkles for Halloween or Christmas gatherings.
Serving Suggestions
These truffles shine as part of a dessert charcuterie board alongside fresh berries, chocolate dipped pretzels, and miniature cookies. For an elegant presentation, place each truffle in a mini cupcake liner and arrange on a tiered stand. They also make thoughtful homemade gifts packed in a decorative tin or clear gift bag tied with ribbon.
Troubleshooting Tips
If your truffles seem too soft to roll, add additional powdered sugar one tablespoon at a time until workable. For dipping challenges, adding a teaspoon of coconut oil to your white chocolate improves flow and creates a smoother finish. If your white chocolate seizes, start over rather than trying to save it – using seized chocolate will result in a lumpy exterior.
 Pin
Pin
Frequently Asked Questions About the Recipe
- → Can I use orange juice instead of orange juice concentrate?
Regular orange juice isn't recommended as a direct substitute as it's less concentrated and would make the truffle mixture too wet. If you don't have concentrate, reduce fresh orange juice by simmering it until thick, then cool before using. Alternatively, use 2-3 tablespoons of regular juice plus 1/2 teaspoon orange extract for proper flavor intensity.
- → How do I prevent the white chocolate from seizing when coating?
To prevent white chocolate from seizing, ensure all your equipment is completely dry, as even small water droplets can cause problems. Melt the chocolate slowly using 20-second microwave intervals, stirring between each. Make sure your truffle balls are well-chilled but not wet with condensation before dipping. If needed, add 1 teaspoon of coconut oil or shortening to the melted chocolate to improve consistency.
- → Can I make these truffles ahead of time for a party?
Yes! These truffles are perfect for make-ahead preparation. You can prepare them up to a week in advance and store them in an airtight container in the refrigerator. For longer storage, freeze the uncoated truffle balls for up to 3 months, then thaw in the refrigerator and coat with white chocolate before serving. The finished truffles also freeze well for up to a month.
- → What can I use instead of vanilla wafers?
Graham crackers make an excellent substitute for vanilla wafers, offering a similar texture with a slightly different flavor profile. Golden Oreos (with filling removed), shortbread cookies, or even animal crackers can work well too. For a gluten-free option, try gluten-free vanilla cookies or a mix of almond flour and gluten-free graham cracker crumbs.
- → Why did my truffles become too soft at room temperature?
If your truffles become too soft at room temperature, it could be due to several factors. You might need to add more powdered sugar or crushed wafers to the mixture for stability. Room temperature variations can affect texture, so in warmer environments, store them in the refrigerator until shortly before serving. Additionally, ensure your butter wasn't too warm when mixing, as this can create a softer final product.