
 Pin
Pin
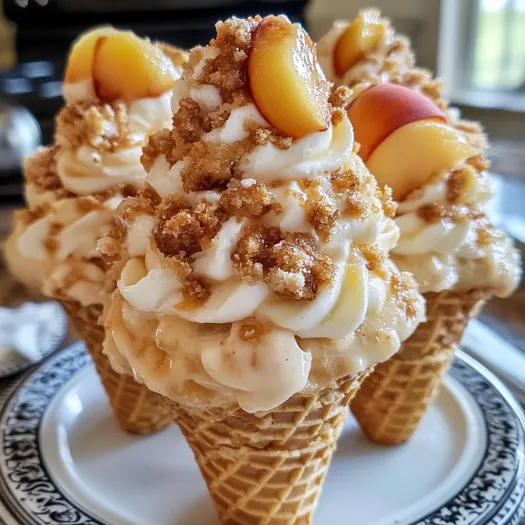
This peach cobbler cheesecake cone recipe transforms two classic desserts into one irresistible handheld treat. The contrast between warm spiced peaches and cool creamy cheesecake, all nestled in a crispy waffle cone, creates a dessert experience that satisfies multiple cravings at once.
I first created these for my daughter's garden party, and they were such a hit that they've become our signature summer dessert. Even my husband, who claims not to have a sweet tooth, can't resist having seconds.
Ingredients
- Fresh peaches: Ripe, fragrant fruit creates the best flavor base
- Sugar: Enhances the natural sweetness of the peaches
- Lemon juice: Brightens the flavor and balances sweetness
- Vanilla extract: Adds depth and warmth to the fruit
- Cinnamon: Provides that classic cobbler spice note
- Cornstarch: Thickens the filling to prevent soggy cones
- Cream cheese: Use full fat for the richest texture and flavor
- Heavy whipping cream: Creates a light, airy texture
- Powdered sugar: Dissolves perfectly for a smooth filling
- Vanilla extract: Enhances the creamy notes
- Lemon juice: Adds a subtle tanginess
- Sour cream: Provides depth and complexity to the flavor profile
- Waffle cones: Look for sturdy ones that can hold up to filling
Step-by-Step Instructions
- Prepare the Peach Filling:
- Cut peaches into small uniformly sized chunks about 1/4 inch pieces to ensure they fit comfortably in the cone. Combine them with sugar, lemon juice, vanilla, and cinnamon in a saucepan, stirring until sugar begins to dissolve. The mixture should immediately smell fragrant and sweet. Mix cornstarch with water until completely smooth without any lumps before adding to the peach mixture. Cook over medium heat, stirring constantly with a wooden spoon to prevent scorching. The mixture will gradually thicken and turn slightly translucent. Remove from heat when it coats the back of a spoon, about 5 minutes. Cool completely before using.
- Create the Cheesecake Filling:
- Beat cream cheese in a large bowl for at least 3 minutes until completely smooth and no lumps remain. This step is crucial for a silky texture. Gradually add the remaining ingredients and continue beating until the mixture holds soft peaks and has doubled in volume. The filling should be light yet stable enough to hold its shape in the cone. Refrigerate for 15 minutes to firm up slightly before assembly.
- Assemble Your Masterpieces:
- Use a piping bag or spoon to carefully add cheesecake filling to the bottom third of each cone. Gently tap the cone on a counter to remove air pockets. Add a layer of cooled peach filling, being careful not to overfill. Continue alternating layers, ending with peach filling on top. For a professional look, use a small spoon to create a slight dome of filling at the top of each cone.
- Final Touches:
- Chill the assembled cones in the refrigerator for at least 30 minutes to set the fillings. Just before serving, add any desired toppings. A light dusting of cinnamon sugar or a small dollop of whipped cream creates a beautiful presentation.
 Pin
Pin
The secret to this recipe is using perfectly ripe peaches. I once made these with underripe fruit and the flavor difference was striking. My grandmother taught me to look for peaches with a slight give when gently squeezed and a strong sweet fragrance at the stem end.
Make-Ahead Options
These cones can be partially prepared in advance to make entertaining easier. Both fillings can be made up to 48 hours before your event and stored separately in airtight containers in the refrigerator. When ready to serve, simply assemble the cones. The cheese filling may need a quick whisk if it has separated slightly during storage.
For a special touch at parties, create a cone assembly station with the fillings in decorative bowls and let guests build their own desserts. This interactive approach always creates excitement and conversation around the dessert table.
Variations To Try
While this recipe features the classic combination of peaches and cream cheese, don't hesitate to experiment with different fruits based on the season. In late summer, blackberries or plums make exceptional substitutes. During winter months, try sautéed apples with extra cinnamon for a warming treat. The cheesecake base remains the same regardless of which fruit you choose.
For a more decadent version, add a thin layer of crushed graham crackers between the fillings to mimic a traditional cheesecake crust. This additional texture creates another dimension of flavor that delightfully contrasts with the smooth fillings.
Serving Suggestions
These cones make a stunning presentation when served on a tiered dessert stand. For a special touch, place each cone in a small glass or decorative cone holder to prevent tipping. This approach lets you create an impressive dessert tower for celebrations.
For a more elegant plated dessert, place the filled cone on its side on a dessert plate, with a small scoop of vanilla ice cream alongside. Drizzle with warm caramel sauce just before serving for a restaurant quality presentation.
 Pin
Pin
Frequently Asked Questions About the Recipe
- → Can I make these Peach Cobbler Cheesecake Cones ahead of time?
Yes, you can prepare both the peach filling and cheesecake filling up to 2 days in advance and store them separately in the refrigerator. It's best to assemble the cones shortly before serving (within a few hours) to maintain the cone's crispness.
- → Can I use canned peaches instead of fresh ones?
Absolutely! Canned peaches work well in this dessert. Drain them thoroughly and reduce the added sugar slightly since canned peaches are usually packed in syrup. You may also need less cooking time as canned peaches are already softened.
- → How do I keep the waffle cones from getting soggy?
To prevent soggy cones, make sure both fillings have cooled completely before assembling. You can also lightly coat the inside of the cone with melted chocolate and let it harden to create a moisture barrier. Additionally, assemble the cones as close to serving time as possible.
- → Can I make this dessert without waffle cones?
Yes! This dessert works beautifully as a parfait in small glasses or mason jars. You can also serve it in small dessert bowls with crumbled waffle cone pieces sprinkled on top for that signature crunch.
- → How do I store leftover assembled cones?
Leftover assembled cones should be stored in the refrigerator, ideally standing upright. Place them in a tall container with a lid or carefully wrap them individually in plastic wrap. Consume within 24 hours for best texture, as the cones will gradually soften.
- → Can I make these cones with other fruits?
Definitely! This versatile dessert works well with many fruits. Try substituting the peaches with berries, apples, pears, or cherries. Adjust cooking times and sugar amounts based on the fruit's natural sweetness and firmness.