
 Pin
Pin
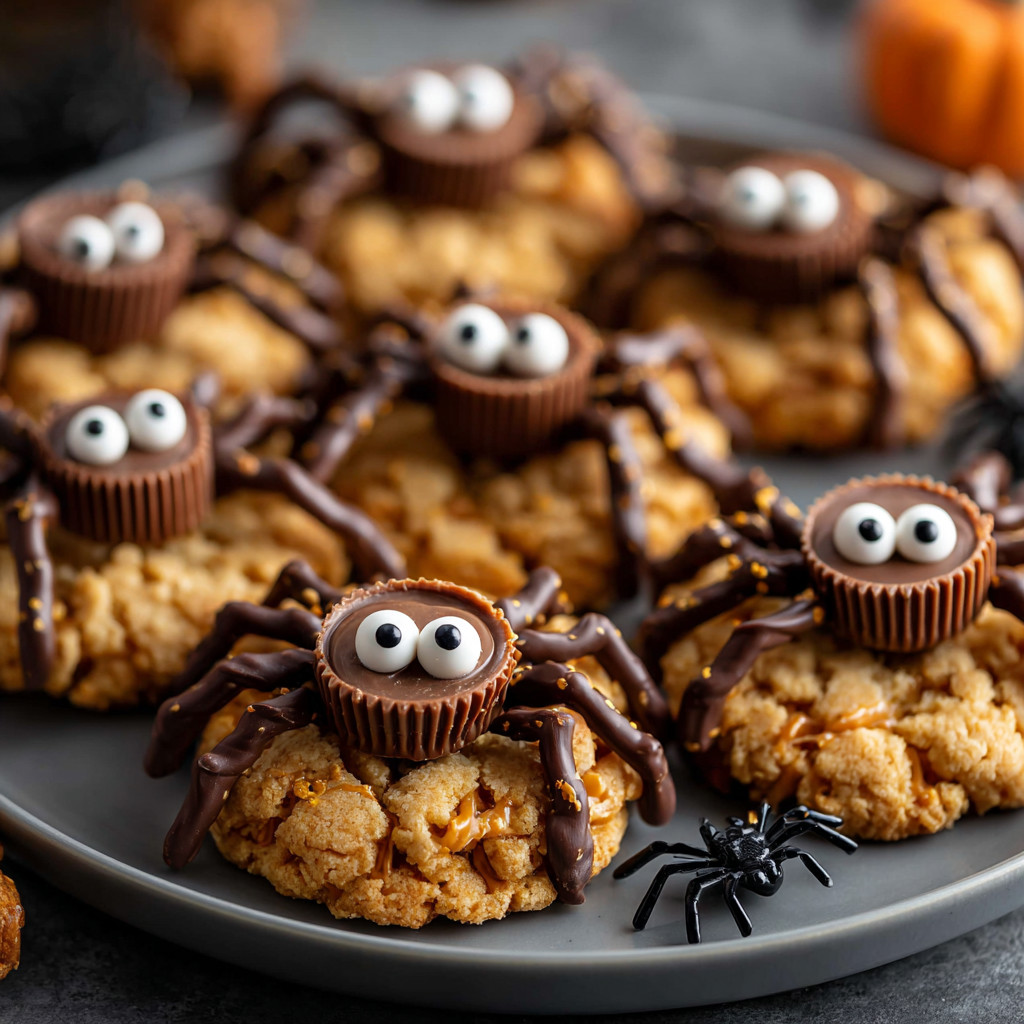
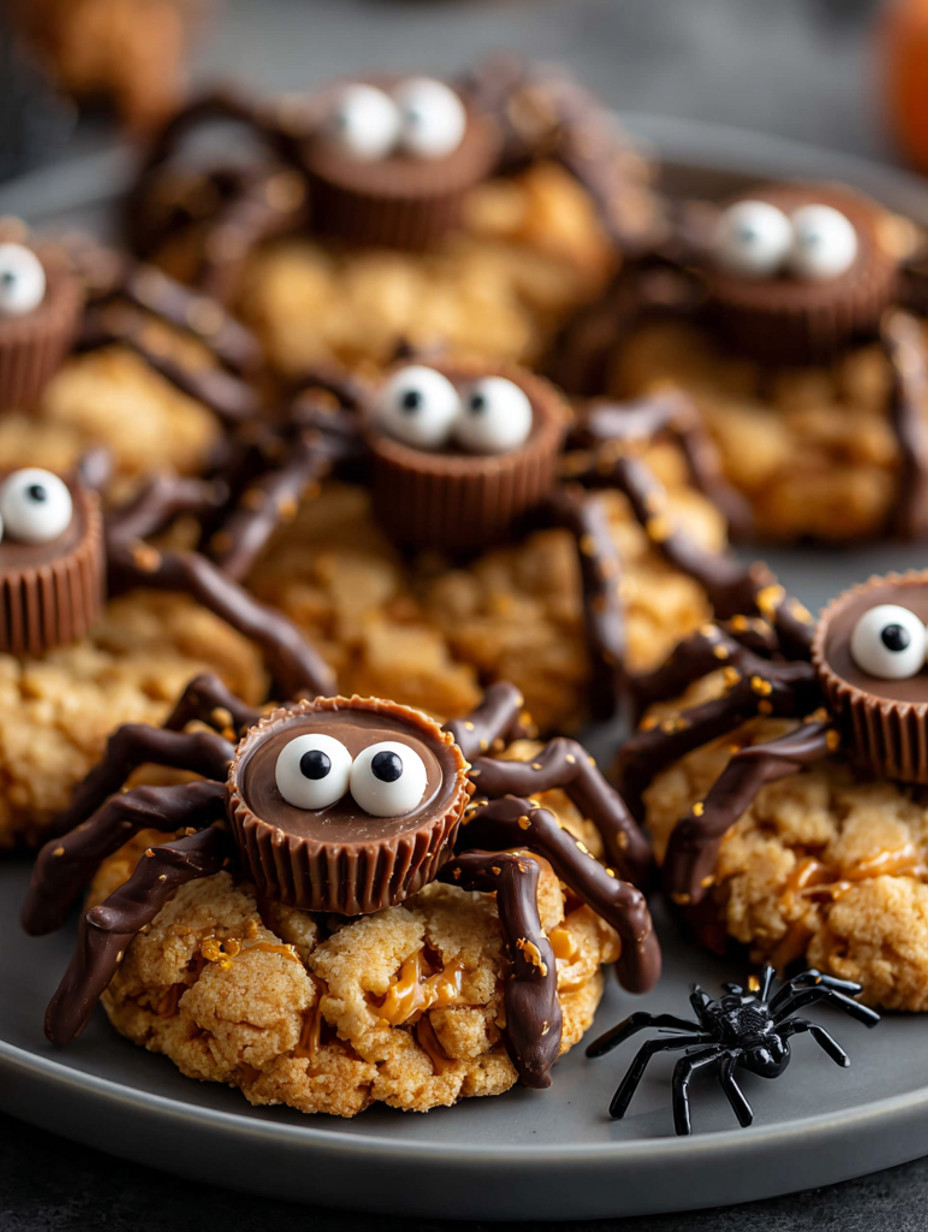
These peanut butter spider cookies are a playful take on the classic peanut butter blossom made to bring smiles and a spooky touch to any Halloween dessert table. They come together quickly without requiring dough chilling yet deliver a buttery soft texture and that irresistible chocolate peanut butter combo. These cookies have become a holiday tradition in my kitchen and always get plenty of oohs and ahhs from kids and adults.
I first baked these for a Halloween get together with friends and they vanished before any other dessert. Making them has since become one of my favorite seasonal traditions.
Ingredients
- Unsalted butter: room temperature for a rich creamy cookie base
- Brown sugar: adds warm caramel notes opt for soft fresh brown sugar for best results
- Granulated sugar: balances sweetness and helps crisp the edges
- Creamy peanut butter: stick to classic brands for the right texture
- Large egg: helps bind everything together so cookies bake up moist and chewy
- Vanilla extract: deepens the cookie’s overall flavor
- All purpose flour: creates the essential cookie structure look for unbleached for a slightly fuller flavor
- Baking soda and baking powder: ensure the cookies rise just right and stay soft inside
- Salt: brings out the peanut butter flavor and keeps the sweetness in check
- Granulated sugar for rolling: adds sparkle and a touch of crunch on the outside
- Mini peanut butter cups: the essential chocolatey spider body freeze before using for best shape
- Semi sweet chocolate chips: melt into smooth glossy spider legs use high quality chips for easy piping
- Candy eyeballs: give each cookie its playful Halloween personality use fresh for stickiness
Step by Step Instructions
- Chill the Reese’s:
- Pop mini peanut butter cups in the freezer just after unwrapping so they stay firm when placed onto hot cookies
- Beat the Butter and Sugars:
- Mix room temperature butter brown sugar and granulated sugar for several minutes until the mixture is airy and pale This step creates a light cookie crumb
- Add Peanut Butter Egg and Vanilla:
- Blend peanut butter into the mixture until completely incorporated Scrape the sides Add egg and vanilla mixing just until combined for a smooth dough base
- Mix Dry Ingredients:
- In a separate bowl whisk flour baking soda baking powder and salt Add the dry mixture to the wet ingredients a little at a time on low speed stopping as soon as no flour streaks remain Overmixing can make cookies tough
- Form and Bake:
- Scoop dough in tablespoon amounts Roll each dough ball until smooth then roll lightly in extra granulated sugar Place on lined baking sheets leaving space for spreading Bake in a 350F oven for 8 to 11 minutes The cookies should look slightly cracked and pale golden on the edges Take them out while still a bit soft
- Add Reese’s Center:
- Immediately press a frozen mini peanut butter cup into the center of each warm cookie Gently push so it sits deep enough but does not split the cookie Let cookies cool on the baking sheet for at least 15 minutes
- Create Spider Legs:
- Melt chocolate chips in a microwave safe bowl in short bursts Stir until smooth Transfer the chocolate to a piping bag or a plastic sandwich bag with a tiny tip cut off Draw four neat curved legs on either side of the Reese’s cup
- Attach Candy Eyes:
- Using a small dab of melted chocolate stick two candy eyes onto each Reese’s center Allow chocolate to set so eyes stay in place Cookies are now ready to serve or store
 Pin
Pin
I love seeing kids’ faces light up when they spot these on the table Their delighted laughter over the little candy eyes makes every batch worth the effort
Storage Tips
Store these cookies in an airtight container at room temperature for up to three days Separate with parchment if stacking to keep the chocolate and decorations neat For long term storage freeze fully cooled cookies for up to three months They thaw beautifully and taste just as fresh
Ingredient Substitutions
If you cannot find mini peanut butter cups try small chocolate truffles or bite sized nut butter cups For candy eyes use small white chocolate chips marked with a dot of melted chocolate as makeshift eyes
Serving Suggestions
Serve these festive cookies as the centerpiece of a Halloween dessert platter They also make perfect takeaway treats for parties or gifts for teachers neighbors or classmates Pack in small boxes or cellophane bags for maximum Halloween fun
 Pin
Pin
Cultural Fun
Building on the nostalgic peanut butter blossom this recipe gets a Halloween makeover with spider legs and candy eyes Americans have loved peanut butter blossom cookies for decades and this playful spin always becomes a new holiday tradition whenever I share them
Frequently Asked Questions About the Recipe
- → Can I use natural peanut butter?
Regular creamy peanut butter is preferred as natural options tend to make the dough oily, affecting texture and softness.
- → How do I prevent the chocolate centers from melting too much?
Freezing the mini chocolate cups before placing them onto the warm cookies helps them keep their shape during baking.
- → Can these be made in advance?
Yes, you can prepare them a day or two ahead and keep them fresh in an airtight container at room temperature.
- → How long will the cookies stay fresh?
They remain fresh for up to three days at room temperature or up to three months if frozen after baking.
- → What can I substitute for candy eyes?
If candy eyes aren’t available, small dots of white and dark chocolate or mini chocolate chips work well as alternatives.
- → Is special equipment needed to create the spider legs?
No special tools are needed; a small piping bag, squeeze bottle, or a plastic bag with a tiny corner cut off can be used to pipe the chocolate legs.