
 Pin
Pin
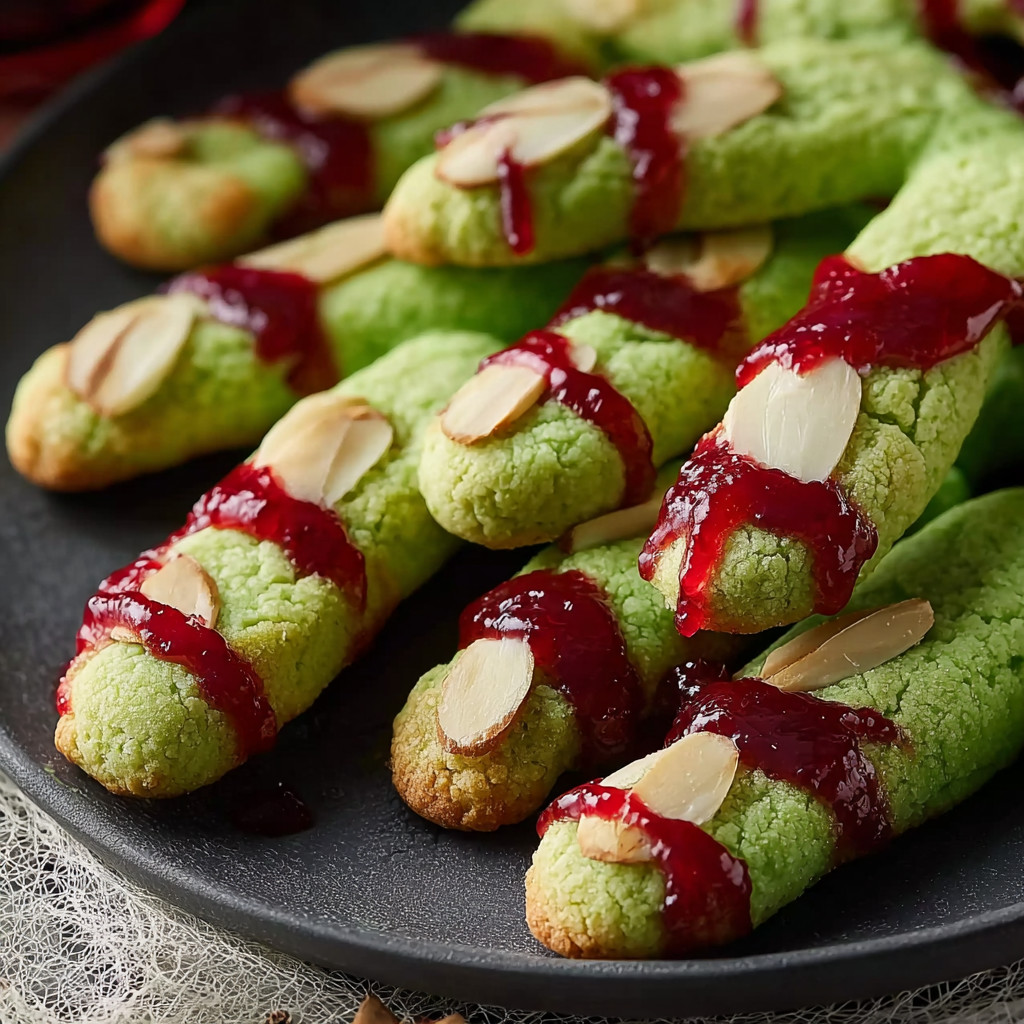
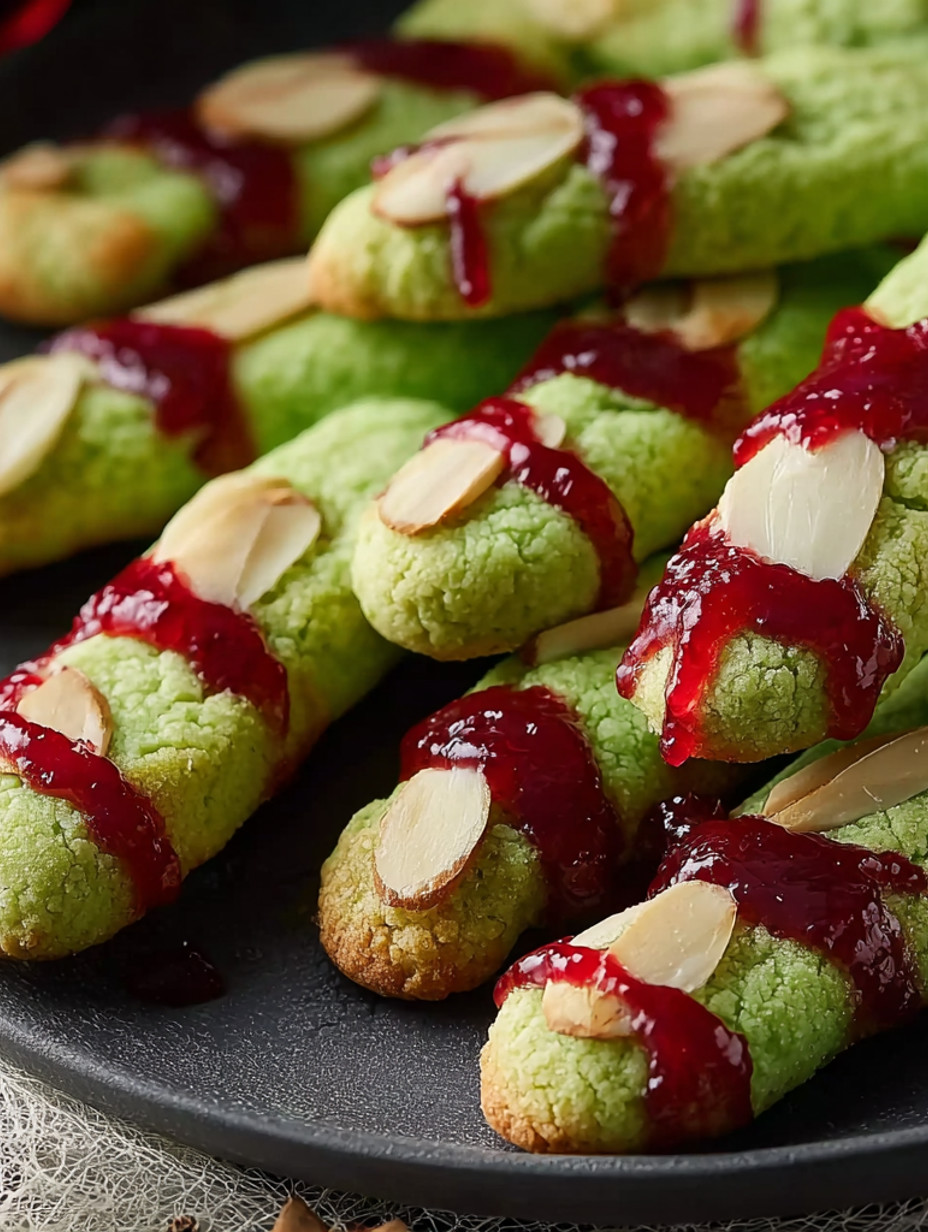
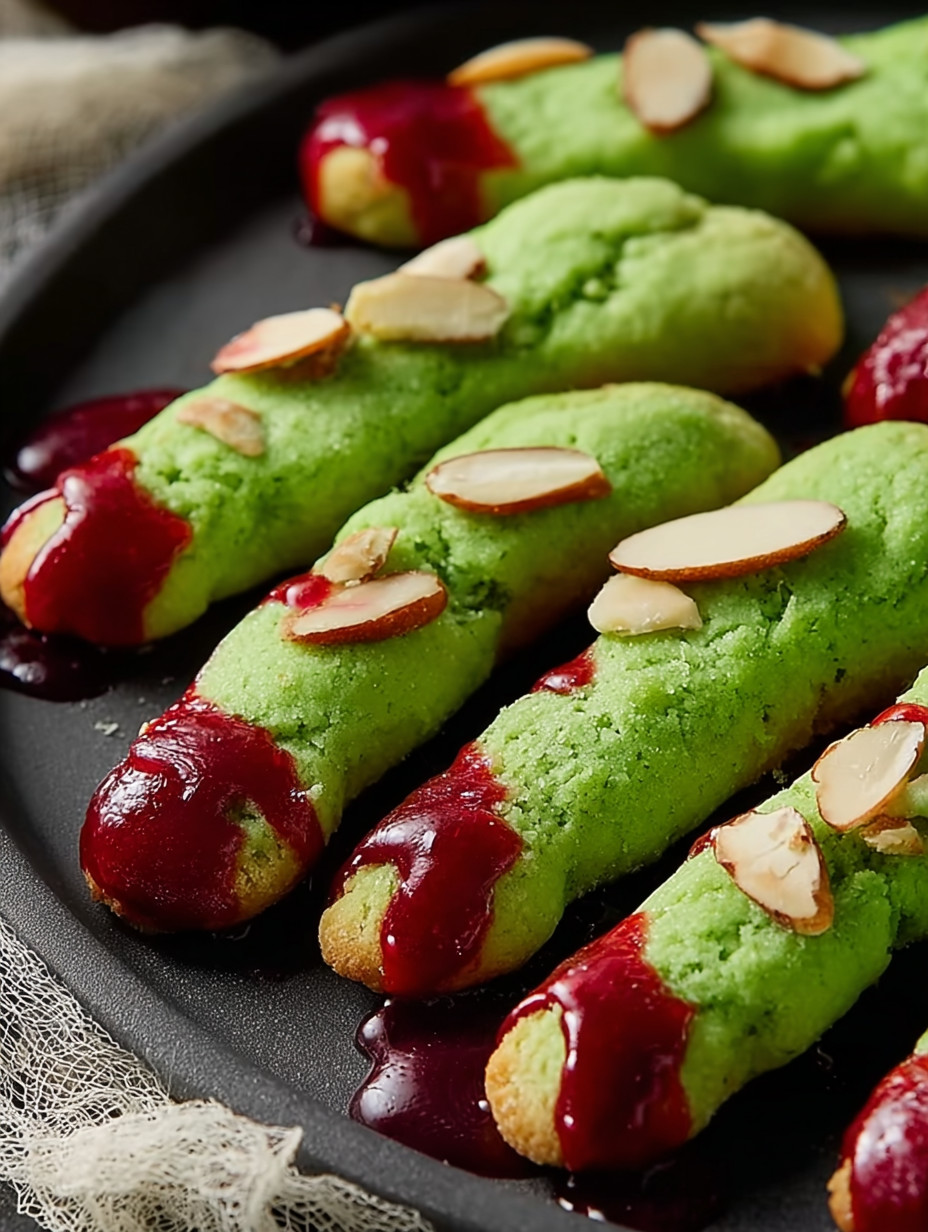
Each October I find myself searching for a dramatic treat that strikes just the right balance of spooky and scrumptious. Witch finger cookies might look creepy on the tray but their buttery shortbread base and subtle nutty bites together make them completely irresistible. Every Halloween party I bring these to, the crowd ends up both horrified and delighted and there are never any leftovers to bring home.
Shaping and decorating these fingers is honestly a blast and the fun alone makes this recipe an annual tradition in my house. Every year my family debates over whether pistachios or walnuts make for better looking warts.
Ingredients
- Green food coloring: This is what gives your cookies that classic witchy hue Use a gel-based dye if you want a vivid green but be sparing since it is more concentrated than liquid
- Unsalted butter: Softened butter is essential for classic melt in your mouth shortbread Choose the best quality you can for richer flavor
- Confectioners sugar: This type dissolves smoothly and yields shortbread that is both crisp and delicate Look for a fine powder without lumps
- Large egg: A whole egg helps bind your dough and enriches the cookies
- Almond extract: Adds gorgeous nutty depth and complements the flavor of the sliced almond nails Buy pure almond extract for truest flavors
- Pure vanilla extract: Even this small amount ensures your cookies are far from one note Higher quality brings warmer more aromatic results
- All purpose flour: The structure here comes from classic all purpose for a delicate crumb Choose unbleached if possible for flavor
- Kosher salt: Just enough to balance the sweetness and enhance the richness of butter Pick a fine flake for even mixing
- Finely chopped pistachios: These create realistic warts and add color and crunch Use freshest you can find for brightest green finish
- Sliced almonds: The iconic fingernail These are best store-bought for neat slices or you could use coconut shards for a nut-free version
- Cherry, strawberry or raspberry jam: For that drippy witches blood effect Darker jams are best for drama and cherry pairs especially well with almond flavors
Step-by-Step Instructions
- Mix the Butter and Sugar:
- Beat softened butter and confectioners sugar in a large mixing bowl until pale and fluffy This step is key as it builds air into the dough for lightness Expect it to take up to two minutes at medium speed
- Add Wet Ingredients and Color:
- Add egg to the bowl and beat until it’s fully incorporated and the mixture looks fluffy Add almond extract vanilla extract and green food coloring Beat again until the color is evenly distributed and the mixture is smooth
- Combine Dry Ingredients:
- In a separate small bowl whisk flour and kosher salt until evenly mixed This ensures no clumps end up in your dough Add flour mixture to the wet mixture Beat on low until just combined then gently fold in the pistachios These add crunch and color
- Chill the Dough:
- Cover the bowl tightly with plastic wrap and refrigerate at least thirty minutes The dough needs to be very cold for shaping If you are not ready to bake you can leave it refrigerated for up to two days
- Shape and Decorate the Fingers:
- Line baking sheets with parchment Take one quarter of the chilled dough and scoop into tablespoon portions Roll each into a log three inches long and one half inch thick This gives the perfect witchy finger proportion Place on baking sheets and press a sliced almond at one end for the nail Pinch just below the almond and halfway down to create witchy knuckles Use a knife to score lines and press a piece or two of pistachio for warts Continue to shape fingers with remaining dough
- Freeze Before Baking:
- Freeze shaped fingers for at least thirty minutes This crucial step stops the cookies from spreading so you get clear finger shapes
- Bake Fingers:
- Preheat your oven to three seventy five and bake fingers for seven to nine minutes Switch trays front to back halfway Cookies are finished when the edges are firm and the tops are dry Let cool on the trays before decorating
- Add Witchy Details:
- Carefully lift the almond nail Pour a small dab of jam under the almond then press it back on so the jam oozes out like witch blood Dab more jam around the bottom of each finger for an even spookier effect Let all cookies cool completely before serving
 Pin
Pin
You Must Know
- Perfect for Halloween dessert tables or themed parties
- Great make ahead treat as both dough and baked cookies keep well
- Color and shape can be customized for extra creativity
Every Halloween my favorite part is how the youngest kids get wide eyed when they see these on the table and then bravely take a bite Once they realize they taste like real shortbread with sweet jam those fingers vanish fast My own favorite ingredient has become the slivered almonds I save the neatest ones all year just for these special cookies
Storage Tips
These cookies can be made in stages which is ideal for events Shape and freeze unbaked fingers in a tray covered tightly with plastic wrap for up to three months Let them thaw briefly at room temperature before baking Baked cookies stay fresh for three days in an airtight container at room temperature with parchment between layers If you need to store longer do so without jam and add it just before serving for best drama
Ingredient Substitutions
For a nut free version use wide unsweetened coconut flakes for both the nails and the warts Also you can swap pistachios or walnuts with sunflower seeds Use any dark red jam for blood raspberry or blackberry works beautifully If food coloring is a concern a bit of matcha powder or spinach puree brings a green tint with a light herbal note
Serving Suggestions
Pile these fingers high on a black tray with extra jam on the side for dipping or dramatic effect They also look great stuck upright in a mound of chocolate cookie crumbs or resting atop a red fruit compote For classroom parties or little monsters keep a batch jam free and offer jam on the side to avoid sticky hands
 Pin
Pin
Cultural and Historical Context
Witch finger cookies are a playful twist on European shortbread traditions customized for the modern love of ghoulish Halloween fun Shortbread hails from Scotland and is prized for its simple ingredients and melt in your mouth crumb Turning this classic into a spooky treat makes it a conversation starter that delivers both style and substance at any autumn gathering
Frequently Asked Questions About the Recipe
- → Why is chilling the dough important?
Chilling the dough prevents it from spreading during baking, helping the finger shapes stay crisp and detailed.
- → Can I substitute pistachios for nuts?
Yes, finely chopped walnuts work well too, or omit nuts entirely for allergies and use coconut flakes as nails.
- → What gives the fingers their green color?
Green food coloring is added to the dough to create the witchy green hue characteristic of these treats.
- → How do I create the realistic nail effect?
Sliced almonds are pressed into the dough tips before baking and then topped with red jam to mimic fingernails.
- → Can different jams be used for the drippy effect?
Absolutely, strawberry or raspberry jam works well to create the desired blood-like look on the fingers.
- → How should these treats be stored?
Store cooled cookies in an airtight container separated by parchment at room temperature for up to 3 days.