
 Pin
Pin
This cheesy pepperoni pizza roll-up recipe transforms simple low-carb tortillas into crispy, gooey treats that satisfy pizza cravings without all the carbs. I discovered this clever technique when looking for quick weeknight options that would please both kids and adults while keeping things lighter than traditional pizza.
I first made these roll-ups during a Friday movie night when I was craving pizza but wanted something lighter. Now they've become our go to quick meal when we want something fun that doesn't require delivery or a long prep time.
Ingredients
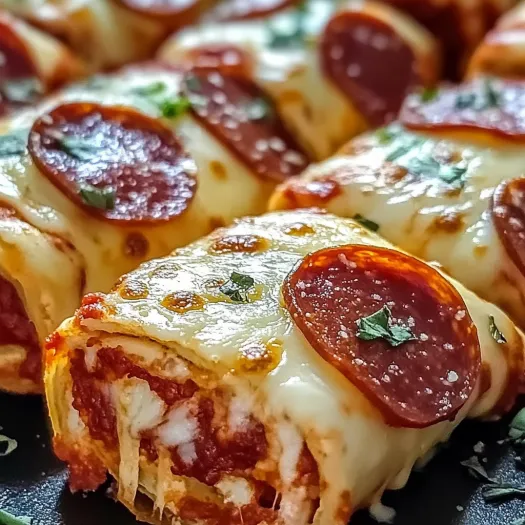
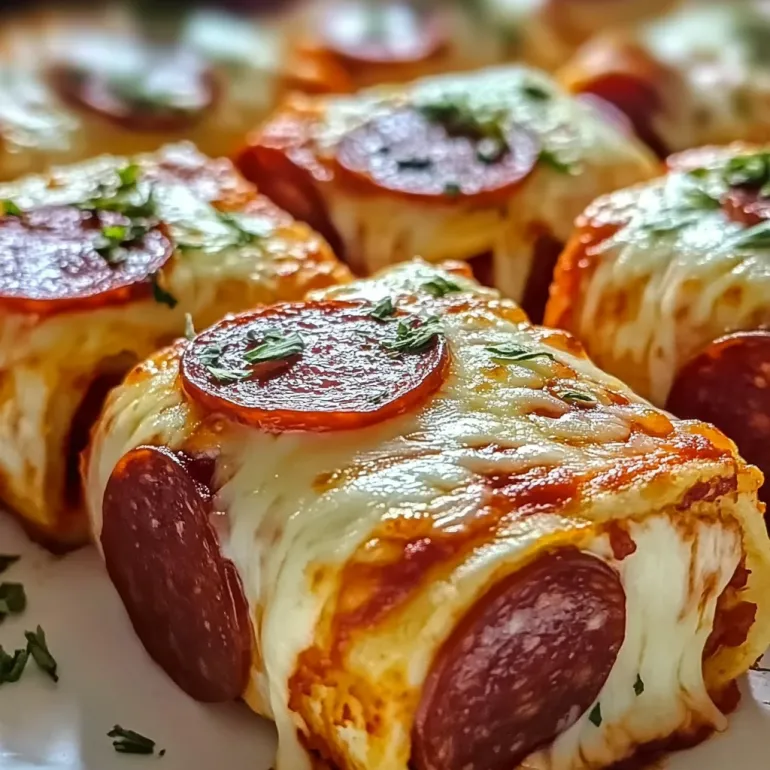
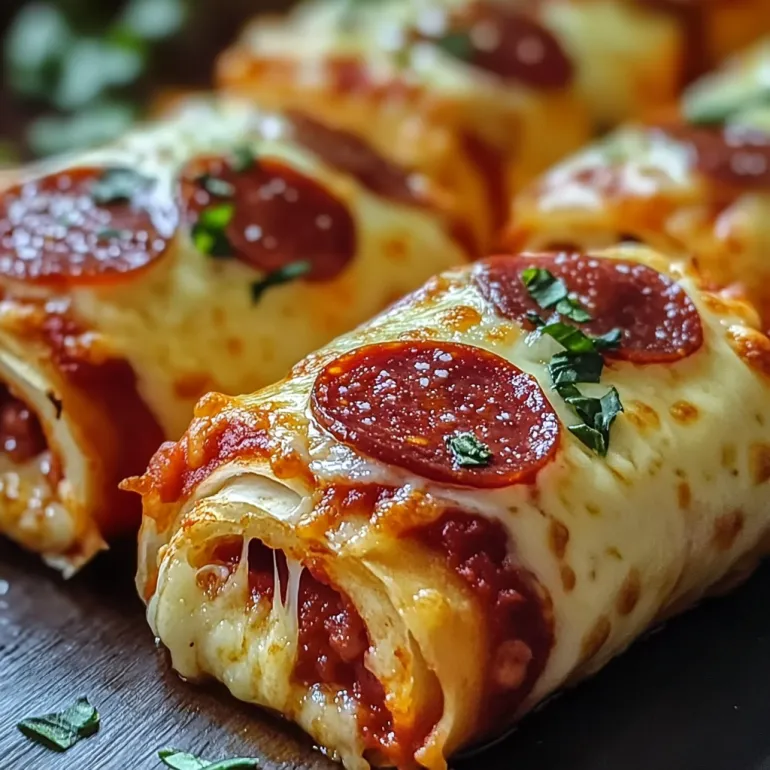
- Mozzarella cheese: creates both the crispy exterior and gooey interior. Use freshly shredded for best melting quality
- Low carb tortillas: provide the perfect wrapper without excess carbs. Look for ones with at least 5g fiber per tortilla
- Pizza sauce: adds authentic flavor. Choose one without added sugar for fewer carbs
- Pepperoni slices: bring that classic pizza taste. Turkey pepperoni works well for a lighter option
- Optional add ins: like bell peppers or olives can boost nutrition and flavor
Step-by-Step Instructions
- Prepare The Skillet:
- Heat your nonstick skillet over medium high heat until hot but not smoking. This ensures the cheese will melt quickly and crisp properly rather than sticking or burning. A good quality nonstick skillet is crucial for this recipe.
- Create The Cheese Base:
- Sprinkle exactly half cup of shredded mozzarella in an even layer directly onto the hot skillet surface. Watch carefully as it begins to melt and bubble around the edges. The cheese should form a circle roughly the size of your tortilla. Allow the bottom to become slightly golden but not brown.
- Add The Tortilla Foundation:
- Once the cheese is melted and starting to crisp at the edges place a tortilla directly on top pressing gently to ensure full contact with the cheese layer. This step bonds the cheese to the tortilla creating that crispy exterior that makes these roll ups special.
- Flip And Add Toppings:
- When the cheese begins to turn golden brown around the visible edges about 1 to 2 minutes carefully slip a spatula under the cheese and flip the entire tortilla in one quick movement. The cheese should now be on top of the tortilla creating a golden crust. Immediately spread a tablespoon of pizza sauce down the center of the tortilla and arrange six pepperoni slices on top.
- Roll With Precision:
- While everything is still warm fold one edge of the tortilla toward the center then continue rolling from that side all the way across making a tight cylinder. The heat will help seal the roll. Place seam side down for a few seconds to help it stay closed.
- Repeat The Process:
- Wipe the skillet clean between roll ups to prevent any burnt cheese residue. Repeat the entire process with remaining ingredients making eight roll ups total. You can keep finished ones warm in a 200°F oven while completing the batch.
 Pin
Pin
The discovery of frying cheese directly in the pan before adding the tortilla was my personal breakthrough moment with this recipe. I had been trying to make low carb pizza alternatives for months and this method finally delivered that authentic crispy texture I was missing. My husband actually prefers these to regular pizza now because they have the perfect cheese to sauce ratio in every bite.
Make Ahead And Storage
These pizza roll ups can be made up to 3 days ahead and stored in an airtight container in the refrigerator. To reheat simply place them in a dry skillet over medium heat for 2 to 3 minutes turning occasionally until heated through. The microwave works in a pinch but will sacrifice some of the crispness.
For longer storage freeze the cooled roll ups on a baking sheet until solid then transfer to a freezer bag. They keep beautifully for up to 2 months. Reheat from frozen in a 350°F oven for 10 to 12 minutes until hot throughout.
Kid Friendly Variations
This recipe has become a lunchbox favorite in our house. For younger children consider cutting each roll up into smaller pinwheel sections that are easier to handle. You can also set up a pizza roll up bar where kids can choose their own toppings before you roll them up.
Some kid approved variations include using ham instead of pepperoni swapping the pizza sauce for ranch dressing or adding a thin layer of cream cheese before the other toppings for extra creaminess.
 Pin
Pin
Serving Suggestions
While these roll ups are delicious on their own they truly shine as part of a larger spread. Serve alongside a simple green salad dressed with olive oil and vinegar for a complete lunch or dinner. For entertaining arrange on a platter with small bowls of warm marinara sauce ranch dressing and pesto for dipping options.
Frequently Asked Questions About the Recipe
- → Can I add other toppings to these roll-ups?
Absolutely! While the basic recipe calls for cheese, sauce, and pepperoni, you can customize with additional toppings like diced bell peppers, mushrooms, olives, or Italian herbs. Just be careful not to overfill, which can make rolling difficult.
- → How do I keep the cheese from sticking to the pan?
Using a good quality non-stick skillet is essential. Make sure the pan is properly heated before adding the cheese, and wait until the cheese begins to bubble and brown slightly at the edges before placing the tortilla on top.
- → Can I make these ahead of time?
Yes, you can prepare these roll-ups in advance and reheat them when ready to serve. For best results, store them in an airtight container in the refrigerator for up to 2 days and reheat in a skillet or oven until warm and crispy.
- → What can I serve with these roll-ups?
These roll-ups pair well with marinara or pizza sauce for dipping, a side salad for a complete meal, or vegetable sticks for a balanced appetizer spread. They're also great alongside other finger foods for parties.
- → Can I use regular tortillas instead of low-carb ones?
Yes, regular flour tortillas will work perfectly in this recipe if you're not concerned about carb content. Corn tortillas are not recommended as they may crack when rolled.
- → How do I prevent the roll-ups from unraveling?
Roll the tortillas tightly and place them seam-side down on the skillet for a few seconds to help seal the edge. You can also secure them with toothpicks if serving as appetizers.