
 Pin
Pin
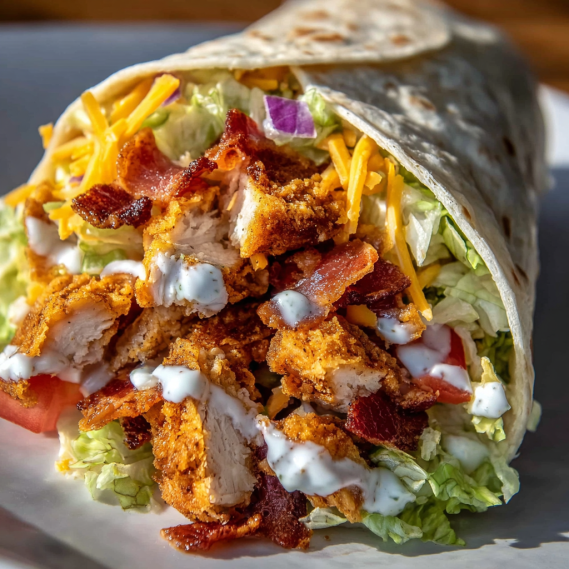
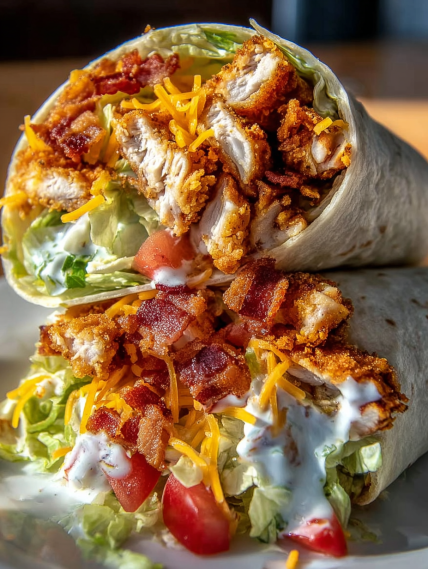
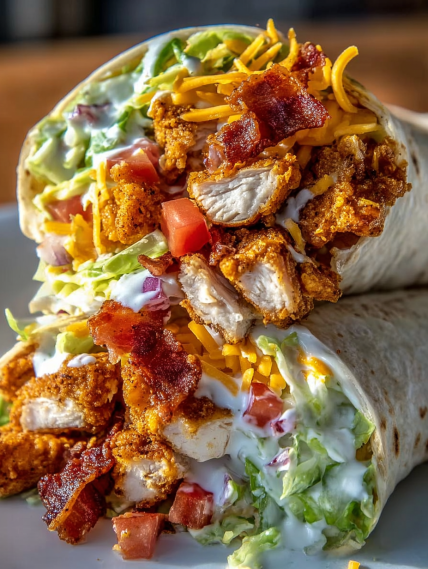
This crispy chicken bacon ranch wrap transforms simple pantry staples into restaurant quality comfort food in less time than it takes to pick up takeout. The golden panko crusted chicken stays perfectly crunchy inside the wrap, and the combination of smoky bacon, cool ranch, and vibrant vegetables creates that diner style bite everyone loves. I came up with this version when I needed something fast but seriously satisfying and now my whole family requests it for lunch almost every week.
The first time I made these wraps was during a week filled with endless errands and very little patience for washing extra pans. That accidental second dip in the buttermilk led to the crispiest chicken I’ve ever made at home. Now every time I take a bite of one, I am right back in my kitchen, kids eagerly waiting for another round.
Ingredients
- Boneless skinless chicken breasts: sliced into half inch strips for maximum crunch and even cooking
- Beef bacon: brings incredible smoky flavor compared to standard bacon but either kind works well
- All purpose flour: is the essential first coating for perfect grip and structure
- Buttermilk: not only tenderizes the chicken but infuses it with slight tanginess that pairs with ranch
- Panko breadcrumbs: are non negotiable for that authentic restaurant style crunch
- Seasoning blend: garlic powder onion powder paprika salt and cracked black pepper gives rich flavor through every bite
- High quality vegetable oil: keeps breading ultra crispy without developing off flavors
- Large burrito size flour tortillas: are resilient enough to hold all those layers without falling apart
- Shredded lettuce: creates a crisp barrier to prevent soggy wraps
- Firm diced tomatoes: add fresh bite while avoiding excess moisture
- Shredded cheddar cheese: melts into the hot chicken adding creamy richness
- A good ranch dressing: ties it all together smooth and zesty either homemade or your favorite store variety
Step-by-Step Instructions
- Season and Prepare Chicken:
- Slice your chicken into equal strips about half an inch thick. In a mixing bowl, combine all the spices, then work them into every bit of chicken using your hands, ensuring even distribution of flavor. Lay out three shallow bowls for dredging – one with flour, one with buttermilk, and one with panko – in a line for quick assembly.
- Create Double Coating:
- Dip each chicken strip first in flour then into buttermilk, allowing the excess to drip off before rolling through the panko. Now for the crunch secret: dip it back into buttermilk and coat again with fresh panko, so the crust becomes extra thick.
- Fry to Golden Perfection:
- Pour enough oil into a wide skillet so it’s about half an inch deep. Heat over medium until a breadcrumb sizzles swiftly when dropped in. Fry the chicken strips in batches for three to four minutes on each side, resisting the urge to crowd the pan. Flip only when deep golden, then let them rest on paper towels.
- Cook Bacon to Crispy Perfection:
- Place bacon strips in a dry skillet over medium heat and let them render slowly, flipping just once or twice until both sides are crunchy and golden. Drain on paper towels then roughly chop into pieces.
- Warm Tortillas:
- Soften tortillas to prevent cracking by wrapping a stack in a damp cloth and microwaving briefly or passing each through a hot dry pan just a few seconds at a time.
- Layer and Roll Strategically:
- Spread a tablespoon of ranch slightly off center of each tortilla. Next, add lettuce to form a moisture barrier, then tomatoes, cheese, two to three chicken strips, and finally the chopped bacon right on top.
- Execute Perfect Rolling Technique:
- Fold in sides of the tortilla before tightly rolling upward from the bottom edge. Squeeze gently but firmly as you go so everything stays packed and secure. Cut diagonally through the center for a classic deli look.
 Pin
Pin
My favorite part of this wrap is how a five minute chicken rest before assembly locks in the crunch while still keeping the meat juicy inside. I also love saving the bacon fat for next day breakfast potatoes – every time I do, it reminds me of my grandmother’s best kitchen tricks. This meal comes together from simple steps but the results always feel a bit special.
Storage and Reheating Tips
Store each component of the wrap separately in airtight containers and hold in the refrigerator for up to three days. Chicken will keep its texture best if reheated in a hot oven for about 5 to 7 minutes. If you must use the microwave, wrap only briefly in a damp paper towel. For bacon, room temperature storage works for several hours if using the same day. Always wait to assemble the wraps until just before serving for peak freshness.
Ingredient Substitutions
Swap in turkey bacon for lower fat with a similar flavor. For dairy free wraps, use a mix of milk alternative with lemon in place of buttermilk and a vegan ranch. Gluten free flour and panko are widely available and deliver comparable crunch. Try colored spinach or tomato tortillas for a new look and subtle taste twist.
 Pin
Pin
Serving Suggestions
Pair your crispy wraps with oven baked sweet potato fries for a perfect salty sweet bite. A tangy green salad with vinaigrette makes a lighter side and helps balance the dish. For a party or potluck, offer the wrap fillings in a buffet style so everyone can personalize their own.
Frequently Asked Questions About the Recipe
- → Can I bake the chicken instead of frying?
Yes, baking at 400°F for 15-20 minutes on a wire rack keeps the breading crisp, though frying yields a deeper golden crust.
- → What tortilla alternatives work well here?
Spinach or tomato-flavored tortillas add subtle flavor and color. Butter lettuce leaves also work for a low-carb option.
- → How do I prevent the wrap from becoming soggy?
Cooling the chicken for 5 minutes before wrapping and layering lettuce against the tortilla creates a moisture barrier that keeps crispness.
- → Can I prepare these ahead for meal prep?
Store components separately in airtight containers for up to 2 days, then assemble and warm tortillas just before serving.
- → How can I add some extra spice to the wrap?
Try sprinkling cayenne pepper into the panko coating or drizzling sriracha ranch on top. Swapping cheddar for pepper jack cheese also adds a spicy kick.
- → How long does the chicken stay crispy after cooking?
The double-coating method maintains crispiness for about 2-3 hours at room temperature; assembling just before eating preserves texture best.